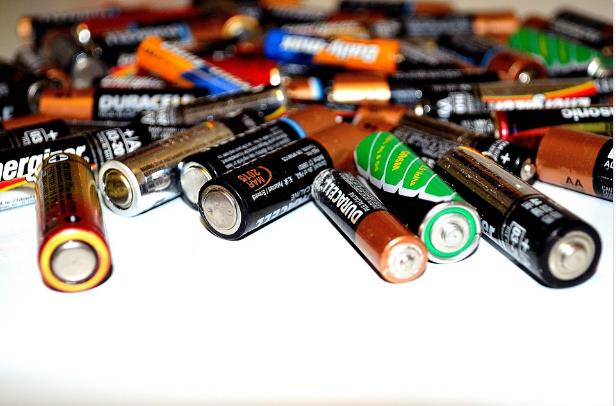

Is it worth getting cheap chisels sharpened? Sadly, the answer to that is no. sharpening cheap chisels isn’t worth the time and effort put into it. Continue reading, you will learn more about getting cheap chisels sharpened.
Table of Contents
Is It Worth Getting Cheap Chisels Sharpened?
As was previously mentioned, spending time, stress, and energy sharpening inexpensive chisels is not worthwhile. You might not get the best outcome, and it takes time and effort.
Why You Shouldn’t Consider Sharpening a Cheap Chisel?
Below are some of the reasons why you shouldn’t consider sharpening a cheap Chisel
It is Time-consuming:
When you have other pressing tasks to complete, are you willing to put in hours honing a chisel? If the answer is no, don’t think about it as a possibility.
If you want a very sharp chisel, it takes more than 30 minutes to sharpen one; this is not a simple task.
It Can Be Stressful:
It takes a lot of time, effort, and strength to sharpen a blunt chisel. To achieve good and desired results, a lot of energy is required.
Except if you’re just doing it to learn how to sharpen a chisel, it’s not worth the stress.
Sharpening Costs Money:
Not only is sharpening a chisel stressful, but it also costs money. The supplies required for the exercise in sharpening will be purchased.
It’s a good idea to consider using a chisel sharpening service.
But since sharpening a chisel costs money, you should be prepared to part with some of it.
Although the price to sharpen chisels varies depending on their size and type, in Europe and other parts of the world, you will need to pay a certain sum to work with a reputable sharpening service.
It Doesn’t Make It a New and Better One:
Even after being sharpened from now until tomorrow, a cheap blunt chisel will still be that way. The fact that it will be sharper than before shouldn’t be minimized; sharpening won’t make it superior to the pricey, brand-new ones.
No matter how long you sharpen it, the quality of a costly chisel cannot be compared to that of an old one. Expensive chisels are made of strong, eatable materials that can withstand pressure and last a long time.
Contrarily, many low-cost chisels are made of flimsy materials that cannot withstand the pressure of sharpening. If you sharpen them frequently for a long time, they are vulnerable to damage.
Poor Edge Retention:
Poor edge retention in cheap chisels makes them incapable of holding a sharp edge for an extended period of time.
They have such poor edge retention that you might need to sharpen them twice before finishing a task. One of the main justifications for avoiding the cheapest chisel on the market is this.
Although expensive, a brand-new chisel ensures admirable edge retention. For your project, you won’t need to regularly sharpen them. Because of this, periodically sharpening a chisel won’t cause you stress.
Why Can’t I Get My Chisels Sharp?
Despite your best efforts, there are a number of reasons why your chisels aren’t sharp. Let’s discuss the issues and potential fixes.
- Poor honing skills or techniques
If you use a bad honing technique, your chisel won’t even come close to being sharp. If you want to create a sharp chisel, you must learn the method used by many experts.
Master the art of honing the cutting edge rather than the bevel’s center. If you want the desired result, stop flattening any area that is too far from the cutting edge.
The best way to sharpen a chisel or develop your honing skills is to watch YouTube tutorials.
- You are using the wrong stone
Throughout the entire sharpening process, sharpening stones are essential. If your stone and chisel don’t work well together, you can’t get a smooth chisel.
To save time and effort, you use the proper chisel sharpening stone. The result won’t be impressive, and using incompatible stones may eventually harm the geometry of the blade.
To maintain the edge of your knife, chisels, and cutting tools, use a flat stone. Make sure to flatten your stone before using it, whether the medium is water, oil, diamond, or Arkansas.
- Your Finishing Abrasive Isn’t Good Enough
The final finishing abrasive was insufficient to deliver the results you were looking for, so you were unable to obtain a sharp chisel.
For instance, finishing at a 4000-grit water stone, a 1200-grit diamond stone, or a soft Arkansas stone won’t produce the sharp edge required to carve a hardwood.
When using a water stone or diamond, you must hone the chisel to 8000 grit. Anything less won’t provide the desired clarity and effectiveness.
- The Sharpening Angle Is Too High
The chisel won’t easily cut or trim the wood because of the hard penetration caused by an extremely high sharpening angle.
A higher final sharpening angle implies that you will use a lot of force when using the chisel.
A low final sharpening angle is the answer to this issue. For instance, a bench chisel should have a secondary bevel of 5 degrees and a 25-degree angle.
What is the Easiest Way to Sharpen a Chisel?
The most straightforward method to sharpen a chisel, according to Petter Lund, is to use a whetstone. Utilizing three high-quality whetstones with grits of 1000, 2000, and 5000, this technique entails sharpening the chisel. The stones are available from Amazon and other online retailers.
In order to flatten your whetstone, you will also need a diamond stone. Purchase a sharpening station for increased convenience and security.
Use the diamond stone to flatten the whetstones. Soak the three stones for about five minutes. Position the honing guide to match your angle on the blade.
Once the back of the chisel is flat, begin sharpening the bevel. For more information on using a whetstone to sharpen your chisel, click here.
What is an Inexpensive Sharpening Setup?
Beginner Setup Supplies
ADDITIONAL ITEMS NEEDED
- Pencil
- Bucket of water to soak the stone
- A sheet of plate glass and 250 grit Wet dry sandpaper* OR a Diamond Plate
- Sharpie marker
* A note on grits – The smaller the number on the grit, the larger the “rocks”, the larger the number, the smaller the “rocks”. For this reason, in order to really sharpen the edge of our tools, we frequently start with a smaller number and increase it.
NICE TO HAVE ITEMS
- Spray bottle
- Razorblade, acetone(for cleaning plate glass), and spray adhesive
- Diamond Plate
- Microfiber cloth
- Jojoba or Walnut oil
Soak the Waterstone
Approximately 10 minutes before use, submerge the Waterstone in water (or keep it submerged until it no longer emits bubbles).
Watch the video above to learn how to make sure your stone is flat to ensure you’re starting with one that is completely flat. Years of frustration with trying to keep your tools sharp could be relieved by this!
Remove Deep Scratches on Bevel from Factory Grind
Essentially, what we’re looking for is the 250-grit scratches from your wet/dry sandpaper on plate glass to replace the factory-created scratch pattern on the bevel.
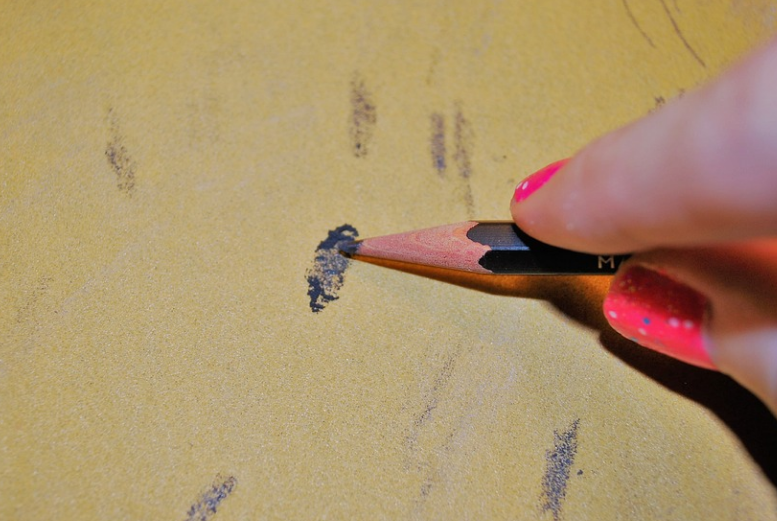
Flatten the Water Stone
Create a grid on the Waterstone with a pencil, and if all the lines disappear within the first few strokes, the stone was initially fairly flat.
The pencil lines will make it easier for you to locate hollows, uneven areas, etc. in your stone.
Place the Waterstone flat on the plate glass’s 250 grit paper, and then move the stone back and forth while using the entire sheet of paper. Check frequently to see your advancement. To re-lubricate, you’ll probably need to occasionally add a few spritzes of water.
Flip the stone lengthwise after a few strokes to wear it evenly as you flatten it. This assists in balancing out pressure variations caused by factors such as how you are holding the stone, where you are applying pressure, etc.
The two cutting sides of your stone are 1000 grit and 6000 grit, respectively. Flatten both sides, but be sure to flatten the 6000 grit side first then the 1000 grit side to avoid contamination.
You can use the stone after erasing the pencil scribbles from both sides of it.
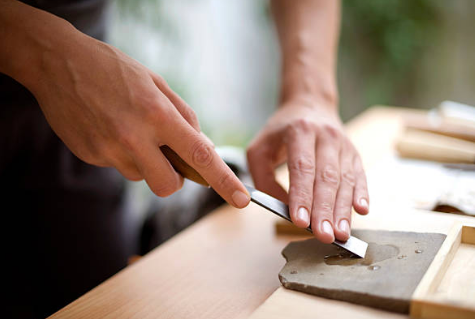
Flatten the Back of the Chisel
The plate glass should be covered with a sheet of wet/dry sandpaper with 250 grit. Using a Sharpie, make a mark on the chisel’s back to indicate where the material is being removed
Flatten the back of the chisel and place it flatly on the stone.
This can be a really long, frustrating process, especially with cheaper chisels because they tend to have been ground with a much larger abrasive and will have had less “human contact” than their more expensive counterparts.
I struck really lucky with the chisel set I bought. It was almost perfectly flat right out of the box, and all that was required was some time spent using my 250-grit paper to remove the factory scratch pattern. However, be aware that this isn’t always the case.
Using the 1,000 Grit Side of the Water Stone, Flatten the Back of the Chisel
You are prepared to hone the bevel once you have removed the 250 grit scratches from your wet/dry paper on the plate glass and can feel a burr raised across the entire bevel of the chisel edge.
Using the 1,000 Grit Side of the Water Stone, Hone the Bevel of the Chisel
Congratulations! You’ve achieved what’s known as a Zero Radius Intersection when you’ve eliminated the 250 grit scratches from your wet/dry paper on the plate glass and you can feel a burr raised across the entire back of the chisel edge.
Remove the Burr
To get rid of the burr you’ve just raised, flip the chisel over and strike the stone twice quickly.
Final Honing at 6000 Grit
You can now use the 6000 grit side of the Waterstone to polish the chisel’s bevel and back. Get rid of the 1000 grit scratches, raise a burr, and get rid of the burr on the chisel’s bevel and back.
Optional- Stropping
Striking is a fantastic failsafe. Due to the extreme hardness of the glass and the stones, any minor movement of our bodies during the sharpening procedure, whether intentional or unintentional, has the potential to reduce the efficiency of our sharpening.
Because a leather strop is soft, it can “bend” to the tip of the chisel a little bit and offer a little “insurance” policy to catch any uneven bits on the back or bevel of the chisel.
The danger with stropping, due to that soft leather surface, however, is rounding the blade back or bevel unintentionally from over stropping, so be mindful to keep your chisel back flat on the strop, and be extra careful not to raise or lower your bevel at all while pulling it along the strop.
Test Your Chisel
*A quick word on safety: At all times, keep all soft (skin) parts behind the chisel. Keep your chisel under control to prevent slippage and unpredictable movement. Always use a clamp or vise to hold your work in place.
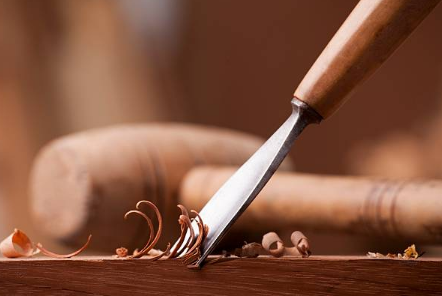
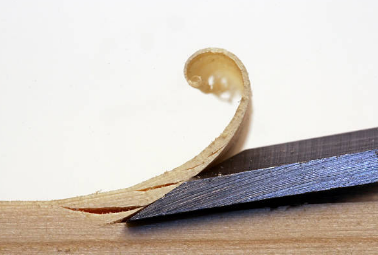
A good chisel should be able to remove transparent shaving from the wood’s end grain. Any shaving that curls away from the cut are a bonus.
A sharp chisel produces shavings, whereas a dull chisel produces dust.
An almost polished-looking surface is produced by a sharp chisel, while a matte, jagged surface is produced by a dull one.
Do Cold Chisels Need Sharpening?
If your cold chisels become dull or blunt, you should sharpen them. Meanwhile, below is a brief step-by-step guide to sharpening cold chisels:
- Wear safety equipment, including eye protection.
- Get ready for your grinding wheel for metal.
- Turn it on and try the slowest setting.
- Keep a firm grip on the cold chisel. Then, let the cutting edge touch the side of
grinding wheel.
- The cold chisel will become sharper on the grinding wheel as long as they are in contact.
Make sure the chisel doesn’t get too hot, though, as that will eventually reduce its effectiveness. Here is a thorough article on how to sharpen a cold chisel.
Is Oil Or Water Better for Sharpening?
Oil stones are preferable to water stones for sharpening because you don’t need to dress or flatten them as frequently. Similarly to this, oil stones outlast water stones.
The oil stone’s only drawback is that novice user may not want to use them. Sometimes, they can be disorganized.
What Oil Do You Use to Sharpen Chisels?
Since it doesn’t harden or go bad, refined mineral oil is the best choice for sharpening chisels. It is lightweight and works with the majority of stones.
Working with non-hardening mineral oil eliminates potentially harmful fumes and odors.
Vegetable oil is sometimes used because it’s inexpensive, but because of its high capacity for hardening, it’s not the best oil to use when honing stones because it could clog them.
How Much Does It Cost to Get Chisels Sharpened?
Due to a variety of factors, the price of sharpening a chisel varies from place to place.
How much it will cost to sharpen a chisel depends on the type and size of the chisel, among other important factors.
Additionally, the sharpening service’s knowledge and experience play a role in this decision.
However, in the US and many other countries around the world, the cost to sharpen a chisel ranges from $10 to $15. Therefore, make sure you have at least $10 before going to any chisel sharpening service in your area.
How Often Should You Sharpen Your Chisels?
Tools can lose their effectiveness surprisingly quickly, and they frequently need maintenance throughout a single project. On average, take time to sharpen your equipment about every 10 to 15 minutes. They may need to be sharpened more or less frequently depending on how they feel, sound, and produce shavings.
Why Can’t I Get My Chisels Sharp?
Usually, a secondary bevel angle of 5 degrees and a bevel angle of about 25 degrees are advised for bench chisels. Sharpening at lower angles frequently doesn’t work with contemporary alloys because the steel will fracture.
Conclusion on Getting Cheap Chisels Sharpened
It is not worthwhile to have inexpensive chisels sharpened. Sharpen bench chisels with a 25° bevel angle for best results. Choose 30 degrees for O1 and 35 degrees for A2 if you want to add a micro bevel. Paring chisels shouldn’t ever be struck with a mallet; they should only be used for hand-guided work.